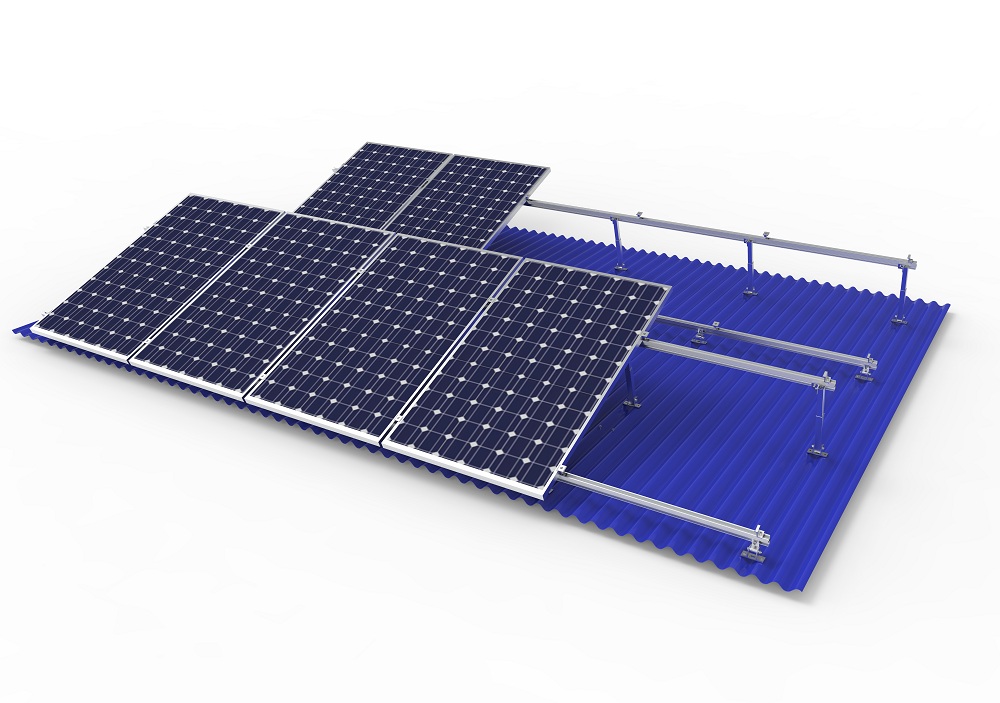
Adjustable Angle Tilt Roof Mounting System
The adjustable foot bracket system is suitable for fixing various common framed solar modules to a colored steel tile roof at a specific angle. The system uses high-strength aluminum alloy structural components, which are light in weight, good in strength, strong in corrosion resistance, and beautiful in appearance.
The system can be installed with angle adjustment, and users can choose the optimal installation angle based on the current longitude and latitude.
- Lester
- China
- 14 weekdays
- 2MW/Week
- AL6005-T5
- AS/NZS1170 ASCE 7-05 DIN1044
- 10 Years
- Information
Product Detail

Product Description:
This adjustable solar roof bracket can be suitable for installation on metal or flat roofs. It can adjust height and tilt angle to achieve optimal efficiency in different seasons and optimize solar output. This bracket is simple, easy to assemble, and inexpensive, widely used in solar floor and roof installation systems. It can tilt to an angle of 10-60 degrees, and there are three different tilt angle solutions to choose from. If you are unsure of the most suitable angle, you can contact our professional design team to solve it for you
Product Features:
(1) Utilizing adjustable brackets to achieve maximum power output
(2) Lightweight aluminum alloy material;
(3) High corrosion resistance, rust prevention performance, and long service life;
(4) Flexible roof installation.
(5) Can be applied to ground and roof installations.
(6) Highly pre installed inclined leg, easy and fast installation, saving labor costs and time.
TECHNICAL PARAMETER | |
Max wind speed | 42m/s |
| Snow load | 1KN/m2 |
| Span range | 0.6-2.5m |
| System installation angle deviation | ± 2 ° |
| Adjustable angle | 10-15, 15-30, 30-60 |
| Design standard | AS/NZS1170 ASCE 7-05 DIN1044, etc |
PERFORMANCE PARAMETER | |
| Installation site | Steel tile roof |
| Main material | AL6005-T5 |
| Fastener material | SUS304 |
| Applicable components | Framed |
| Applicable layout method | Vertical layout |
| Warranty period | 10 years |
INSTALLATION INSTRUCTIONS
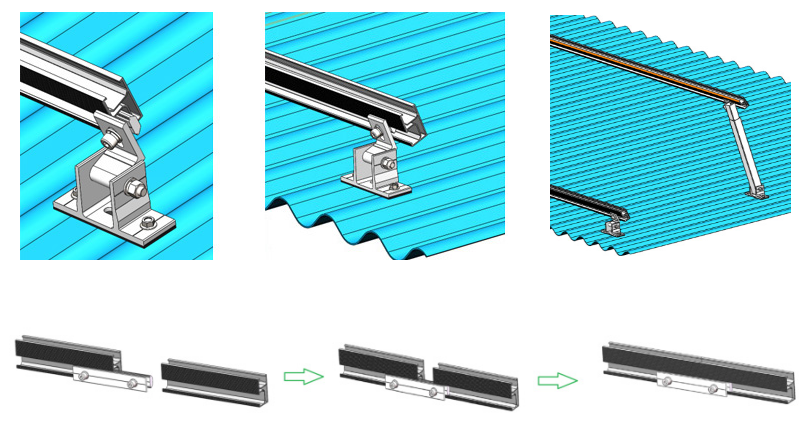
1. Install the front foot and rear support
Fix the front foot and rear support onto the ridge of the colored steel tile with wooden screws.

2. Installation track
Slide the rail inward against the clamp on the hook, adjust the distance, lock the studs, and secure the rail. If the track length is insufficient, multiple tracks should be connected together through track connectors.

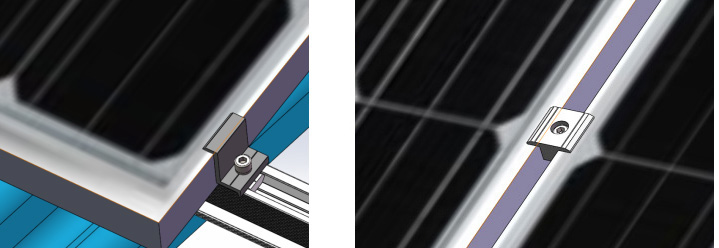
3. Install components
Secure the assembly to the track using side pressure and medium pressure.


